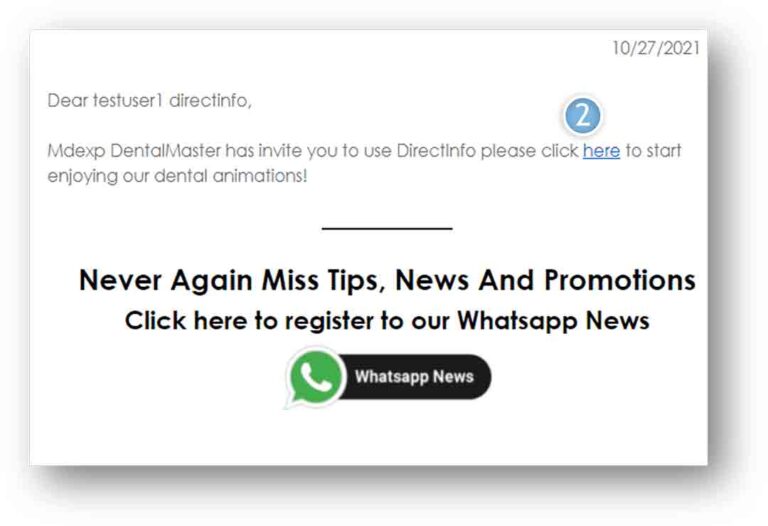
If next time you don’t remember or want to change your password, click “Forgot Password”.
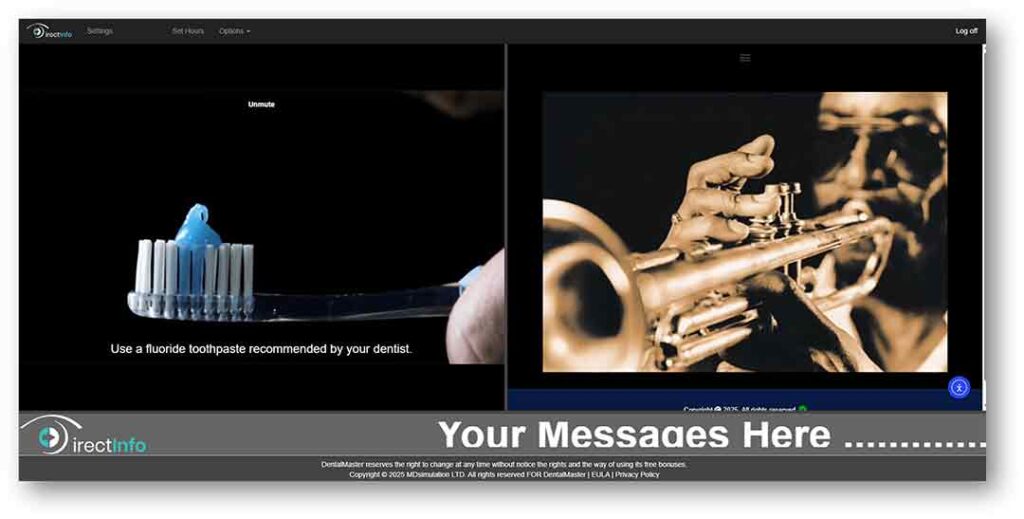
Main Screen
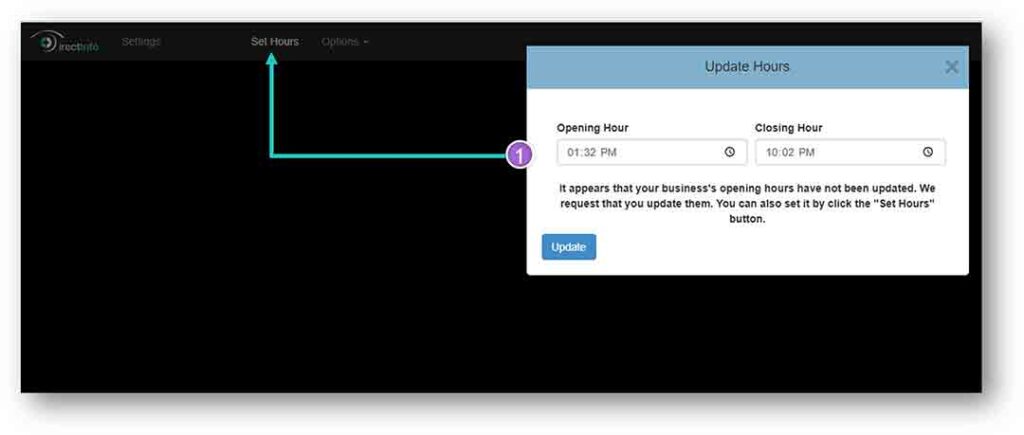
Getting started – Setting Hours
Update the Opening and Closing Hours of the Clinic
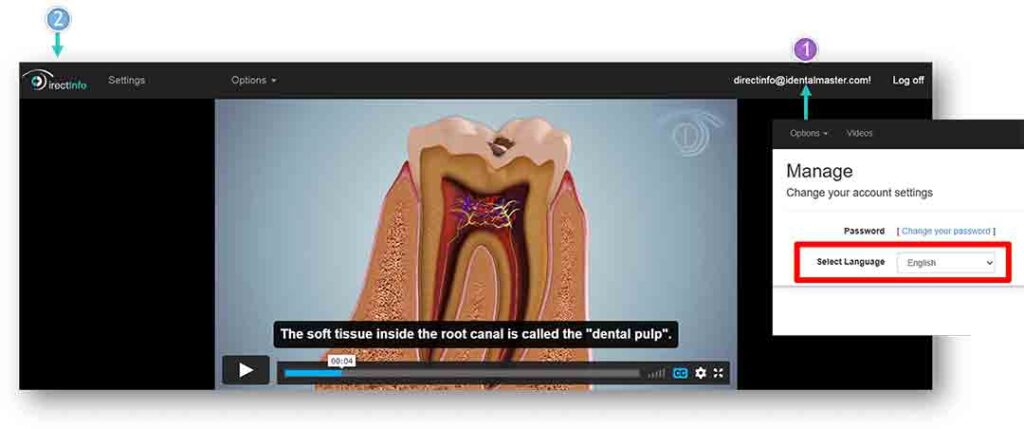
Getting started - Language
Set Interface language by clicking on your email then select language
Click the logo DirectInfo to go back to the Main Screen
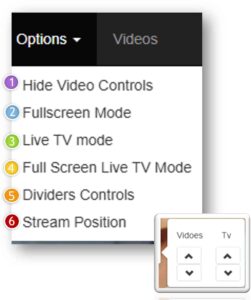
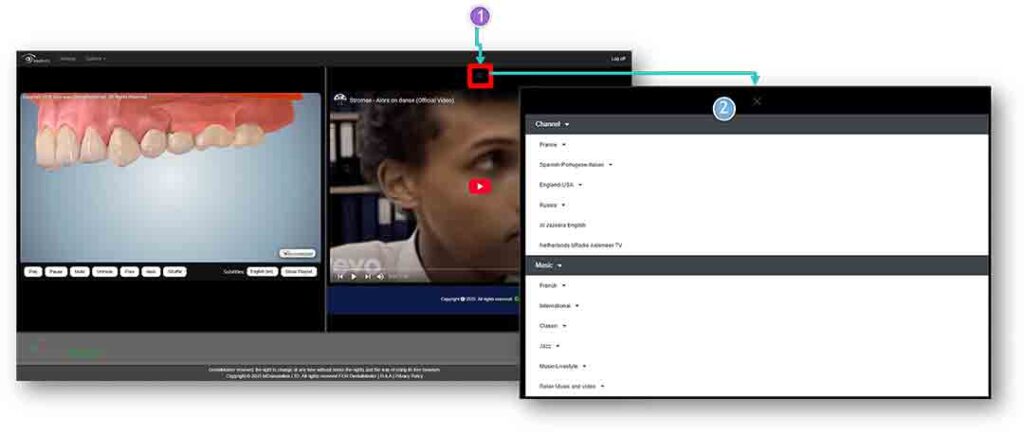
Options
Show / Hide Player controls (more on Slide Player).
Press Esc to exit mode (Like in YouTube).
Show / Hide TV Streaming.
Show only TV or Player.
Control position of divider (the line in the middle of the screen).
Move the TV and Player up or down.
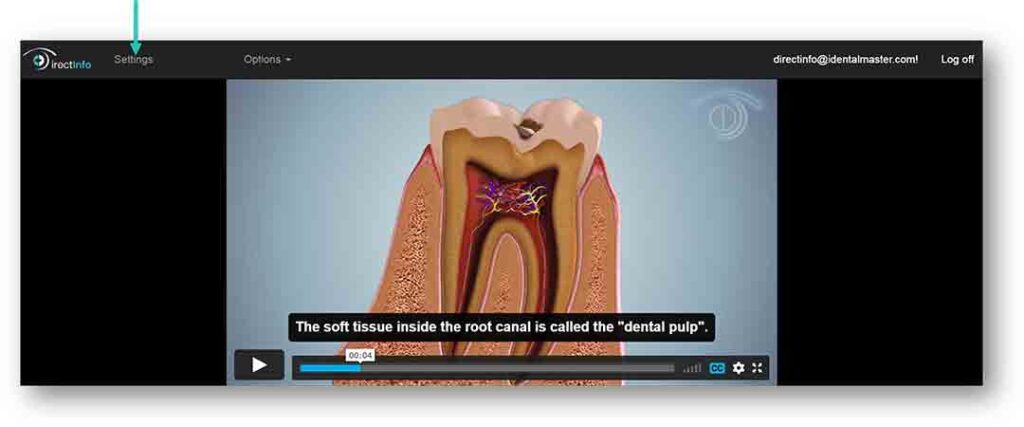
Getting started - Setting
Click “Settings” for other options.
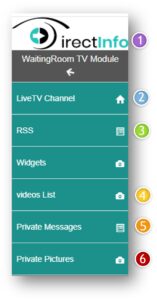
Settings Menu
Click the logo DirectInfo to go back to the Main Screen.
Choose Channel of live TV Stream. (We do not Supply Television Channel we try to insert some legal channel available on the net this module may stop at any time)
Choose source of News RSS to run on bottom of the Main Screen in-between your messages.
Manage your playlist.
Create messages to be insert for your patients at the bottom of the Main Screen.
Add and manage your own pictures.
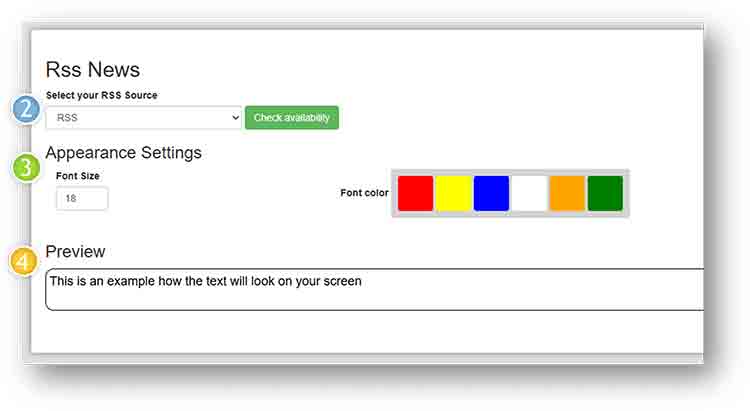
RSS - Settings
Select your RSS Source.
Select Font Size and Font color
Preview of how the text will look on your screen
The RSS and Privet messages will alternate on the screen. First your message then RSS.
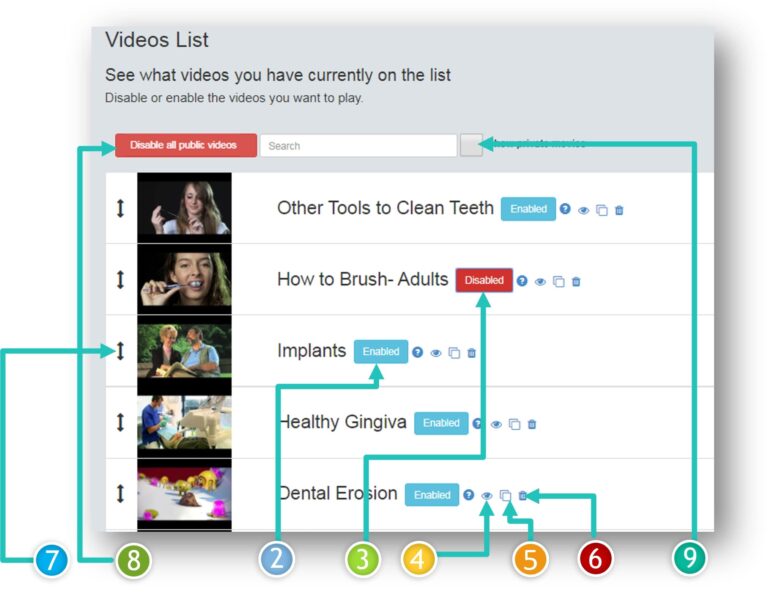
Video List - Settings
Videos that are played will be indicated with a blue “Enabled” button.
If you want to remove a video from the Playlist, click this button and it will turn to a red “Disabled” button.
Watch the video directly from the list.
Duplicate the video to play it multiple times throughout the playlist.
Remove the video from the list entirely (this cannot be undone).
To change video position, click the arrows and drag to desired place.
If you wish to only show your private videos and not the built-in DentalMaster videos, click “Disable all public videos”.
To filter the list to show a list of only your private videos, check the “show private movie” box.
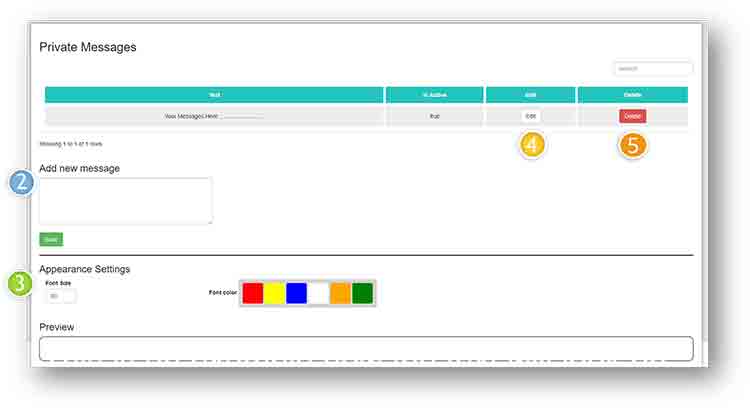
Private Messages - Settings
You can add your own messages shown to scroll at the bottom of the Main screen.
Go to settings, then click “Private Messages”.
Write a message then click ‘save’ to add the message.
Change appearance of the message.
Edit a message with the ‘Edit’ button.
Remove a message with the ‘Delete’ button.
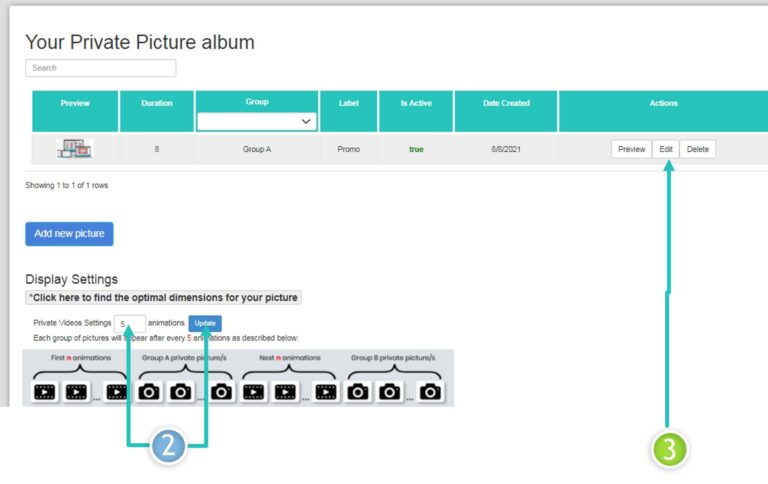
Private Pictures - Settings
You can add your own pictures to be shown between the videos. The pictures can be arranged into groups (up to 4 groups) to be shown consecutively. For example: Group A can be about the clinic and Group B about special technologies.
Go to settings, then click “Private Pictures” .
Set frequency of picture groups between DentalMaster movies, click update.
Manage pictures already added.
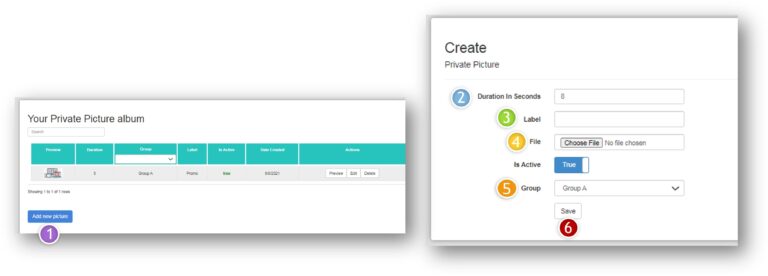
Private Pictures - Add a picture
To Add a new picture, go to “Add Picture”.
Set duration of each picture to be shown .
Give name to picture (optional).
Choose picture from your library.
Designate the picture to a group (A-D).
Click Save.
TV
Click on the Menu
Chose from the many options
How to automate the launch
of the DirectInfo application for Windows or Android
This is a suggestion. We are not responsible for the operation or installation of these modules or any damage it may cause .
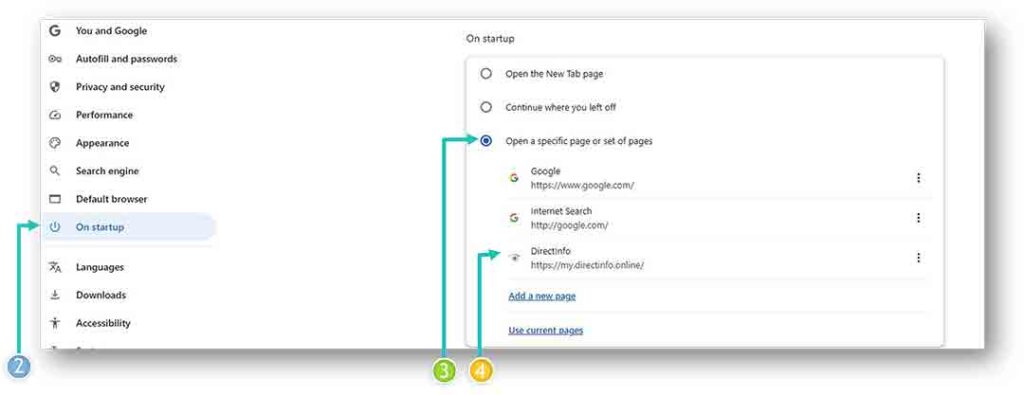
First Open Google and set the page of you App to be the default page
Go to Google chrome setting
Click On Startup
Select “Open a specific page or set of pages”
Insert the App URL in the field or select current pages if the App is Open in Google chrome
Setting Task Timer- For Windows
If You do not want to turn the app on and off every day manually, you can set a timer when to start and when to turn off automatically.
Step 1: Open Task Scheduler Press Windows Key + S and type Task Scheduler. Open Task Scheduler.
Step 2: Create a Task to Open the Website In the right panel, click Create Basic Task Give it a name, e.g., Open My Website. Choose how often you want it to run (Daily, Weekly, etc.). Set the Start Time (the time you want the website to open). In the “Action” step, select Start a Program. In the Program/script box, enter the path to Chrome, for example: “C:\Program Files\Google\Chrome\Application\chrome.exe”
Setting Timer- For Android
Download MacroDroid (simpler than Automate): Install MacroDroid (free for up to 5 macros).
Create a new Macro to launch Chrome: Trigger → “Clock” → choose the time (example: 9:00 a.m.). Action → “Applications” → “Launch Application.” Select Google Chrome as the application.
(Optional) Create a second Macro to close Chrome: Trigger → “Clock” → 10:00 a.m. Action → “Close application” → Google Chrome.